Sunday, November 15, 2009

Pumpkin Cookies

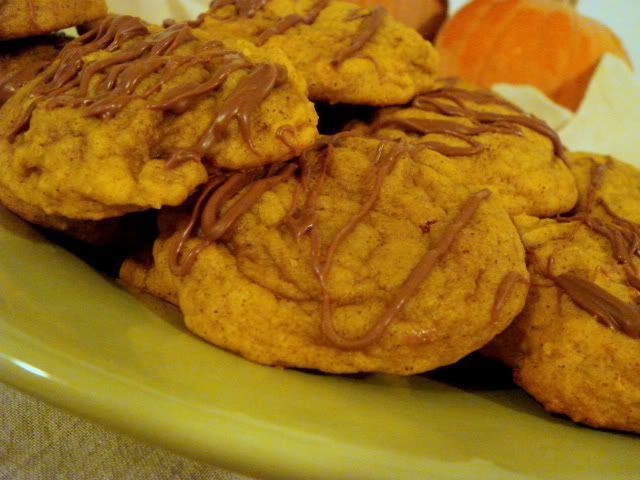
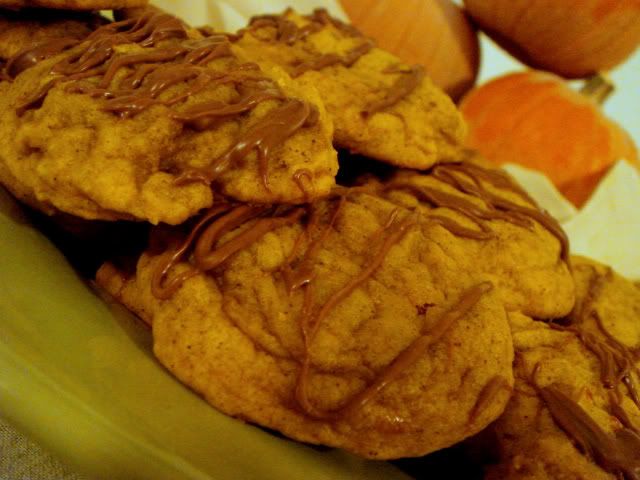
What better to make this time of year than pumpkin cookies. Well, anything pumpkin I think. You might as well take advantage of it while you can! I've never made pumpkin cookies so I thought I'd give it a try this year, and I'm glad I did. They're really good!!

Photobucket

I found this recipe on allrecipes.com. It's suppose to have a glaze on top, but I didn't have powdered sugar like I thought I did, and I didn't want to run to the grocery store. So I improvised. I melted some chocolate and drizzled it on top instead. Having done that I'm not sure if I would have liked the glaze topping. I think it might have made it a little too sweet. I honestly liked them plain without the chocolate too. They're very cake like and moist. They're not too sweet like most cookies. The only bad thing is that they're a little addicting. Especially if you're a fan of pumpkin.

What I really like is that they're super easy to whip up. Just your basic ingredients and a cup of pumpkin puree. Pretty simple. The recipe says to bake for 15-20 minutes. I only baked mine for 12 and I think I could have probably done them for 10-11 minutes. Not a bad cookie I'd have to say so myself.

Photobucket

Pumpkin Cookies

2 1/2 cups all-purpose flour
1 teaspoon baking powder
1 teaspoon baking soda
2 teaspoons ground cinnamon
1/2 teaspoon ground nutmeg
1/2 teaspoon ground cloves
1/2 teaspoon salt
1/2 cup butter, softened
1 1/2 cups white sugar
1 cup canned pumpkin puree
1 egg
1 teaspoon vanilla extract

2 cups confectioners' sugar
3 tablespoons milk
1 tablespoon melted butter
1 teaspoon vanilla extract

1. Preheat oven to 350 degrees F (175 degrees C). Combine flour, baking powder, baking soda, cinnamon, nutmeg, ground cloves, and salt; set aside.

2. In a medium bowl, cream together the 1/2 cup of butter and white sugar. Add pumpkin, egg, and 1 teaspoon vanilla to butter mixture, and beat until creamy. Mix in dry ingredients. Drop on cookie sheet by tablespoonfuls; flatten slightly.

3. Bake for 15 to 20 minutes in the preheated oven. Cool cookies, then drizzle glaze with fork.

4. To Make Glaze: Combine confectioners' sugar, milk, 1 tablespoon melted butter, and 1 teaspoon vanilla. Add milk as needed, to achieve drizzling consistency.

Wednesday, November 11, 2009

Chocolate Peanut Butter Cup Cookie

Well, I guess I've decided to start posting again:) It's been a fun, busy last couple of months and I think I'm finally starting to get the hang of having a baby and still accomplishing things. Hopefully I'll keep this up a little better. I have sooo many things I want to bake and try and talk about. But I thought I'd start back up with my all time favorite cookies.

I found this recipe when I was in high school and have been in love sinse. They are dangerous to bake though. I tend to start eating the peanut butter chips, chocolate chips, and peanut butter cups......mmmm.....Anyway.....

They are pretty simple and come out great. It's hard to tell when they're done cause they are a darker cookie, but I usually under cook mine a little cause they come out better that why. I bake them for 9 minutes. They still look pretty soft, but you don't want to cook them for too long. The recipe says to let them sit on the cookie sheet after taking them out and you should. They are really delicate, especially right out of the oven. I also use a bag of miniature Reeses, freeze them, cut them, and then fold them in while they're still frozen. That way they don't smash and you can really taste them when you bite into it.

These are truly the best. But beware, they are also very tempting. I always have to give mine away so I don't get too tempted!

Photobucket

Chocolate Peanut Butter Cup Cookies
  • 1 cup butter, softened
  • 3/4 cup creamy peanut butter
  • 3/4 cup white sugar
  • 3/4 cup packed brown sugar
  • 2 eggs
  • 1 teaspoon vanilla extract
  • 2 1/3 cups all-purpose flour
  • 1/3 cup cocoa powder
  • 1 teaspoon baking soda
  • 1 cup semisweet chocolate chips
  • 1 cup peanut butter chips
  • 10 chocolate covered peanut butter cups, cut into eighths
  1. Preheat oven to 350 degrees F (175 degrees C).
  2. In a large bowl, cream together the butter, peanut butter, white sugar, and brown sugar until smooth. Beat in the eggs one at a time, then stir in the vanilla. Combine the flour, cocoa, and baking soda; stir into the peanut butter mixture. Mix in the chocolate chips, peanut butter chips, and peanut butter cups. Drop by tablespoonfuls onto ungreased cookie sheets.
  3. Bake for 8 to 10 minutes in the preheated oven. Let cool for 1 or 2 minutes on sheet before removing, or they will fall apart.

Tuesday, August 4, 2009

Dinner Rolls

Photobucket

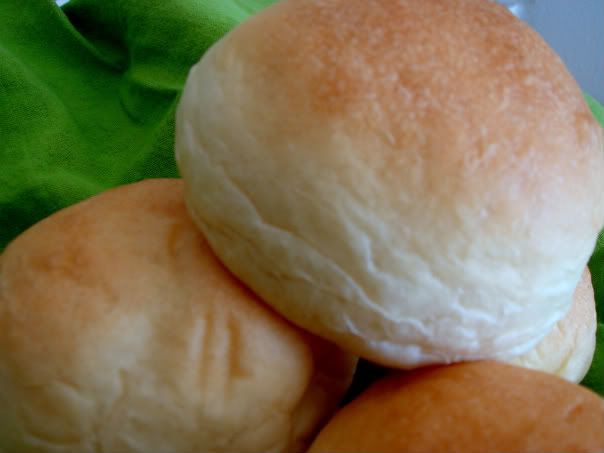
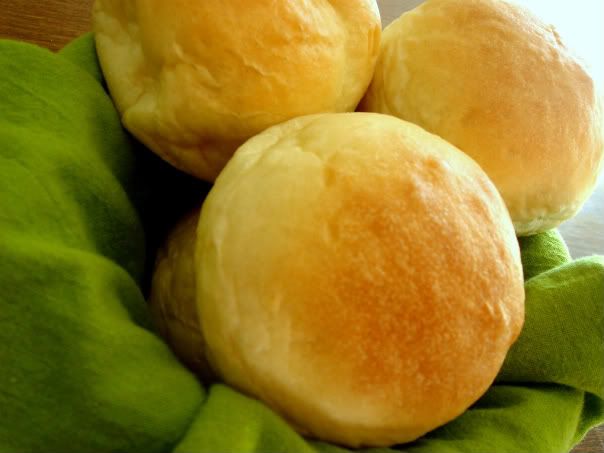
I wasn't going to post about these rolls. I've been making them forever, but they're just so good and I think I've finally gotten to where I really know how to make them. The recipe comes from one of my mom's cookbooks. I honestly don't know the name of it. We just always called it the "Mormon Cookbook".


If these are made just right they come out so soft and fluffy. Breads are fun to make, but I've noticed everytime I make some sort of bread it's always done a little differently. Sometimes I have to add more flour, while others I don't add quite as much. It's all about the touch I think. You can do exactly what the recipe calls for, but it might not turn out quite right. This recipe calls for 6 cups All-Purpose flour. I usually end up with 7-8 cups, just depending. If you have a scale and are able to weigh out your ingredients you can usually get a more accurate about of what you're suppose to put in. Weighing is better than measuring:)

When mixing dough you want to be able to touch and pick it up after it's done kneading, but you don't want it to be compeltely dry. I like my dough where there's still stickiness to it. If that makes sense. I usaully have to get a little flour on my hands to handle it and form it into a ball and let it rise. If you get it so that it's really easy to handle, then the rolls usually turn out hard and dense, not light and fluffy.

One thing that I loved learning in school was the window technique. A recipe will tell you to knead for 8-10 minutes, but how do you know you're done? The kneading process is done to make your dough elastic and that's exactly what you want. If you take a piece of the dough and slowly start to spread it and it just tears, it's not done. You want to create a "window". I usally roll a little piece into a ball and then slowly start stretching it. If I can get it pretty thin and it hasn't ripped then I usually let the rising process start.

For these rolls I weigh my pieces out into about 3 oz. portions. I'm not good at eyeballing and I like my rolls to look somewhat similar in size. 3 oz. makes a pretty good size roll. For this batch I made 2 dozen rolls with that size. If you have something to cut each roll out it works better then tearing the dough apart. I use a metal bench scraper. After cutting I rolled them, let them rise for about 30 minutes and then I baked them for 10 minutes and once they came out started rubbing butter on the tops. They're so good and make the house small so nice. I love the smell of cooked bread!

Photobucket

Dinner Rolls

2 packages (2T) active dry yeast
1/2 cup warm water
1/4 cup sugar
6 cups flour scooped
1/2 cup nonfat dry milk
1 T. salt
2 cups warm water
2 eggs, beaten
1/2 cup oil

Soften yeast in 1/2 cup warm water to which sugar has been added.

In a large bowl stir together flour, dry milk, and salt. Making a well in the center, add 2 cups warm water, yeast mixture, eggs, and oil in that order. Stir until well mixed, adding more flour, if needed, to make a soft dough.

Cover. Allow to rise in a warm place until double. About 1 hour.

Turn out onto a lightly floured board. Knead a few times to make dough easy to handle. Pinch off smooth round pieces about egg size; arrange 2 inches apart, on a greased baking sheet. Cover lightly with a clean towel. Allow to rise 20 minutes. Bake 10 minutes, or until golden brown, at 400F.


Sunday, August 2, 2009

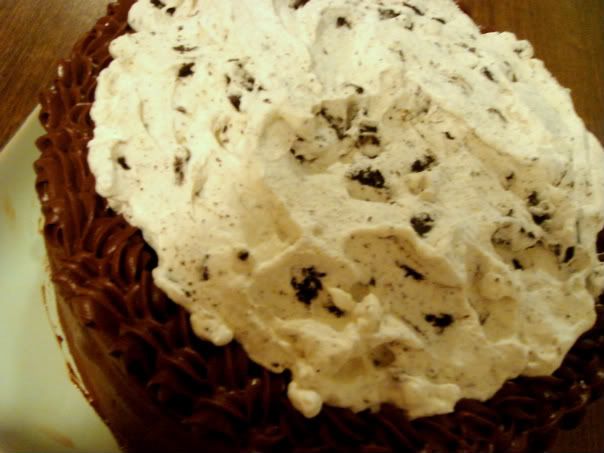
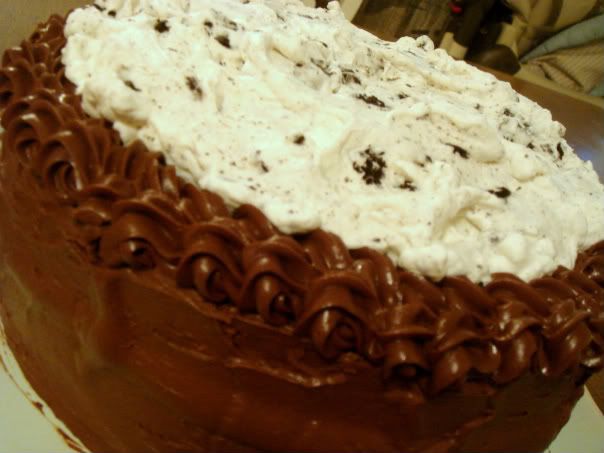
Cookies N Cream Cake

Photobucket

If you want a chocolate cake with a little something extra, this is perfect. Especially if you like oreos, or Cookies N Cream Ice Cream. Todd's birthday was last week and I wanted to make him something special, not just a plain chocolate cake. I found this idea on Annie's Eats. What's funny is that she uses the same chocolate cake and icing I always do. It's just the Hershey's recipe you can find on the back of Hershey's Cocoa. I love this recipe. It always turns out so moist.

Photobucket


So I just used my typical cake recipe and then made the cookies n cream filling. It was just whipped cream with chopped up oreos folded in. I was a little leery about what it'd taste like, but I thought it tasted pretty similar to what the ice cream tastes like. My only problem was, was that after putting the filling on the bottom layer of cake and then putting the second layer on it would kinda slide around. I don't know if it was because our apartment was a little warmer, but maybe next time I'll let the whip cream sit in the fridge for a few minutes before putting it on the cake. It might let it chill again and be a little firmer. But that was pretty much my only problem. I thought it was going to me hard to cut into, but it wasn't. It turned out just right! We served it was Vanilla Ice Cream, but I thought with the whipped cream it could be eaten without ice cream and still be good.

Cookies and Cream Cake
Ingredients:
For the cake:
2 cups sugar
1 ¾ cups all-purpose flour
¾ cup cocoa powder
1 ½ tsp. baking powder
1 ½ tsp. baking soda
1 tsp. salt
2 eggs
1 cup milk
½ cup vegetable oil
2 tsp. vanilla extract
1 cup boiling water

For the filling:
1 ¼ cups heavy cream
1/8 cup confectioners’ sugar
¼ tsp. pure vanilla extract
10 chocolate sandwich cookies, chopped

For the frosting:
½ cup unsalted butter
2/3 cup cocoa powder
3 cups confectioners’ sugar
1/3 cup milk
1 tsp. vanilla extract

Directions:
To make the cake, preheat the oven to 350°. Grease and flour two 9-inch round baking pans.

Stir together the sugar, flour, cocoa, baking powder, baking soda and salt in a large bowl. Add eggs, milk, oil and vanilla; beat on medium speed for 2 minutes. Stir in boiling water (batter will be thin). Pour batter into prepared pans.

Bake 30-35 minutes or until a toothpick inserted in the center comes out clean. Cool 10 minutes; remove from pans to wire racks. Cool completely.

To make the filling, in the bowl of an electric mixer fitted with the whisk attachment, combine the heavy cream, confectioners’ sugar and vanilla. Beat on low speed until all sugar is incorporated; increase speed to high and whisk until stiff peaks form. Gently fold in chopped cookie pieces with a rubber spatula.

To make the frosting, melt the butter in a medium bowl. Stir in the cocoa. Alternately add confectioners’ sugar and milk, beating to spreading consistency. Add small amount additional milk, if needed. Stir in vanilla.

To assemble the cake, place one cake layer on a cardboard cake circle. Pipe a ring of the chocolate frosting around the outside edge of the cake. Fill the area inside the ring of frosting with a thick layer of the cookies and cream mixture. Place the second cake layer on top. Frost the sides of the cake layers with chocolate frosting. Pipe a decorative border of the chocolate frosting on top of the cake. Fill the area inside this border with a thick layer of the cookies and cream mixture. Garnish with extra chocolate sandwich cookies and whipped cream if desired.


(the recipe calls for 10 cookies, I think I used about 15. I kept adding till I got it the way I liked it)

Tuesday, July 7, 2009

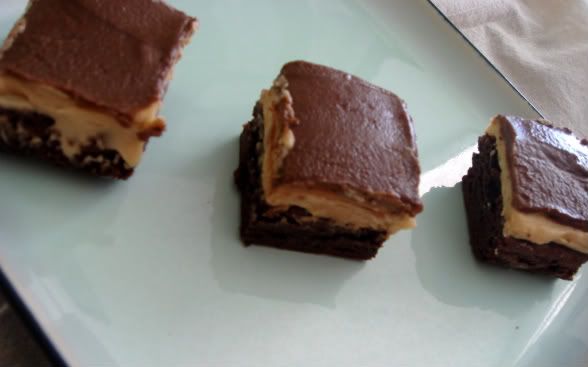
Peanut Butter Truffle Brownies

These brownies were sooooo good. Especially if you're a fan of chocolate and peanut butter. I found these on the Betty Crocker website. You start with your brownie. Make a peanut butter frosting, and then top it off with a nice little chocolate glaze. So easy and oh so good. The recipe calls for a brownie mix. I was going to use my own recipe, but at the last minute decided to be lazy. Plus I think most brownie mixes come out better then brownies from scratch.

Photobucket

The recipe states to either grease your brownie pan, or line it with foil. I lined mine with foil. It made it so much easier to work with. Once the brownies were cooled I just lifted the ends, of the foil, and took em out. Peeled the foil away from the sides and then started frosting it. After spreading the frosting on I let it set in the fridge just to firm it up and make it easier for the glaze. Once I put the glaze on I let that set up in the fridge also. I tried cutting some before it was completely set cause I was trying to go somewhere, but it's best to wait. When it came time to cut the rest I kept running my knife under warm water and wiping it clean so you'd have clean looking brownies, if not the peanut butter comes up and gets in the glaze. Also I made these pretty small which I'm glad I did. They were way rich and easier to eat that way.

Photobucket
(see how the peanut butter came up into the frosting on the middle one. clean knife makes them look much better)

Go here if you'd like to try the recipe out! Beware they are very addicting.

(once again sorry for the poor picture taken. I was tired and in a hurry.)

Monday, June 15, 2009

Challah

Alright, well I've taken a few weeks off. Due to traveling and being sick, I couldn't muster up anything to try and bake something nice. But now that I'm back I wanted to work with something I LOVE.
BREAD

I could bake and eat bread all day if it would constitute a healthy diet. But unfortunately you've gotta add some other stuff with it. There's nothing better than baking bread and having the aroma consume your home. I love it! Then the whole getting your hands in and kneading the dough. It's a little therapeutic in a way. There's just something that bread does that any other baked good can't do for me.

Anyway, when I was in high school I worked at a bakery where I was able to make Challah (the C is silent by the way). It's a Jewish egg bread, and it's oh sooo delicious! It's good as a sandwich, french toast, regular toast, or just snacking on. YuM! What I think is fun about it is that you get to braid it and not just put it in a loaf pan. Lame I know. But still, it's fun :).

The recipe I choose came from The Bread Bible. This cookbook is really indepth stuff. I was honestly really excited. For this challah you start by making a sponge either early in the morning, or the night before. It consists of part of the yeast, flour, and water for the dough. Then after it rests for atleast an hour you add more flour and yeast and let it rest for another 4 hours. Then you start mixing the rest of the ingredients and knead the dough. So needless to say it's an all day process, but one I was looking forward to!

Well, from this experience I learned that I need to be more prepared. The recipe tells you to use only a certain kind of flour and oil, but I thought I could just use what I had and I'd see what happen. This recipe wasn't a complete flop for me, but at the same time it was. My challah did not turn out to be anything like challah is suppose to really be. From the picture you can tell it doesn't look like it's suppose to. It usually has a much darker coloring. That is my fault. Well, everything that went wrong was my fault. Like I said before I was not prepared like I thought I was. I ended up running out of eggs so I couldn't do the glaze which gives it the right color. I ran out of honey, so it didn't have the right sweetness to it. Then when I was braiding it, I compeltely forgot how I did my 4-braids so it didn't turn out too pretty by the time I figured it out. I thought that even if it didn't look exactly like I wanted it should still have the same taste, but nope. Obviously being a little short on honey does take away the sweetness, but the right texture wasn't there either. It was real heavy. It just wasn't great. But we live and learn right?!

I really want to do this recipe again, but do it exactly how it says to and with the exact ingredients it says. So for furture reference, if a recipe tells you to use King Aruthur unbleached All-Purpose Flour, use exactly that. It really does make a difference.

Thursday, May 21, 2009

Homemade Oreo Cookie


Alright, this week I wanted to do something nice and simple. Since going to school I've realized that I'm a simple baker. If that makes sense. I love baking and making something taste so delicious that's all someone will think about while they're eating my creation. I'm not a decorator. I, in all honesty, HATE cake decorating. I've tried and tried, but I'd rather spend my time on the taste then the appearance. You can still make something look amazing with out all the hoopla. I'm still trying though. Just ask Todd. He knows when I'm trying to decorate a cake. Practice makes perfect right?!


Anyway....off my little rant...so since I didn't have much time this week (we're leaving for Denver on Friday), as I said before I wanted something simple. I don't think I've craved too much during this pregnancy, but a couple weeks ago I was walking through Walmart and saw a bag of Oreos. They looked so good. I knew Todd would want to get them if I mentioned it. But surprisingly enough he said we didn't need them. Shocking I know. Since then I've been wanting some with a glass of milk (and for those that know me know I can't stand milk). Mmm...sounds so good though. When I was trying to figure out what to bake this week it popped into my head Homemade Oreos. I've made them before and they're quite easy. All you need is a couple boxes of cake mixes, a few basic ingredients, and cream cheese. The best part, they're way better than store bought:)

The recipe says to bake them for 10-13 minutes. Usually depends on your oven and the size. Mine only cooked for 8 minutes. As the cookies cooled mine became a little hard. I thought I over cooked them, but when you bite into them they're just right. They soft, but give a little crunchiness so they're almost like the real oreos you buy. The recipe made a ton of cookies. Didn't really get to count them, but if you don't need tons I'd half it next time. It took forever. Part of that could have been due to the fact that I made them pretty small.


Homemade Oreo's
2 Devils Food Cake mixes

1 1/4 C Butter

4 eggs

1 tsp vanilla


Directions:Mix well. Roll into cherry sized balls. Place on an ungreased cookie sheet. Bake at 350 degrees for 10-13 minutes. Cool on rack.


Cream Cheese Filling

(1) 8 oz pkg cream cheese

1/4 C butter*1 tsp vanilla

3 1/2 C Powdered Sugar.


Mix well and spread between cooled cookies.

Tuesday, May 19, 2009

Strawberry Shortcakes


This past week I decided to try making strawberry shortcakes. I LOVE strawberries and they're soooo good right now. I found this recipe on Good Eats N Sweets. If you want to see better pictures I'd check out her blog. I've never made shortcakes before, or at least that I can remember. The recipe was pretty simple. Having never made these, I'm not sure if my shortcakes came out correctly. I know the batter was like making biscuits and you're not suppose to work them too much. The cakes rose a little, but not much. There was still room to cut in half. I actually don't think I would have wanted them any bigger. There might have been way too much cake. The recipes tells you to pat the dough into a square, but I actually rolled it so that probably could have done something to not make them rise too much.


The strawberries were sooo nice and refreshing. My favorite part about strawberry shortcakes are that they are light and don't make you feel like you're eating a real heavey dessert. If you're in the mood for a spring/summer dessert I'd try these. Simple and sweet!

Strawberry Shortcakes
FOR THE SHORTCAKES
2 cups all-purpose flour
2 teaspoons baking powder
1/2 teaspoon kosher salt
2 tablespoons sugar plus 1 tablespoon for glazing
1 teaspoon freshly grated lemon zest
4 tablespoons (1/2 stick) cold unsalted butter, cut into 1/4-inch pieces
1 cup cold heavy cream
2 tablespoons whole milk or heavy cream, for glazing

FOR THE STRAWBERRIES
1 dry quart fresh strawberries, rinsed, hulled, and sliced
3 tablespoons sugar (or more to your taste)

FOR THE WHIPPED CREAM
1 cup cold heavy cream
3/4 teaspoon pure vanilla extract
1 tablespoon plus 1 1/2 teaspoons sugar

BEFORE YOU START
Position a rack in the center of the oven. Preheat the oven to 350° F. Line a cookie sheet with parchment paper or aluminum foil.

TO MAKE THE SHORTCAKES
In a large bowl, whisk together flour, baking powder, salt, 2 tablespoons of the sugar, and the zest. Using a pastry blender, cut in the butter until it resembles a course meal. Little by little, stir in heavy cream until the dough starts to hold together (you may use a bit more cream if need be).
Turn the dough out onto a lightly floured work surface. Pat together to form a rectangle 5 inches wide by 7 1/2 inches long that is about 1 inch thick. Cut the long side of the dough into thirds, and the width in half to form six 2 1/2-inch squares. Place the shortcakes 3 inches apart on the prepared cookie sheet.
Brush the tops of the shortcakes with the milk or heavy cream and sprinkle with the remaining tablespoon of sugar. Bake for 20 to 25 minutes, or until light golden brown. Remove to a wire rack to cool to room temperature.
While the shortcakes are cooling, prepare the strawberries. In a medium bowl, combine the sliced strawberries with the sugar. Set aside for 20 to 30 minutes to macerate.

TO MAKE THE WHIPPED CREAM
In the bowl of an electric mixer fitted with the whip attachment, beat the heavy cream and vanilla on medium speed. In a slow steady stream, add the sugar and beat until the mixture forms medium-stiff peaks.
The whipped cream is best used when just made, but can be refrigerated in an airtight container overnight and beaten again before serving.

TO COMPLETE THE SHORTCAKES
Fork split each shortcake in half horizontally. Place one half on each of six plates. Spoon 2 tablespoons of berries on each with a large dollop of whipped cream. Spoon more berries on top. Place each of the remaining halves on top of the berries. Garnish with more cream and berries, if desired. Add a sprig of mint for garnish, if you’d like.

(sorry about the pictures. They're not the greatest. I couldn't get the camera to focus and then the sun was going down which didn't help with the lighting. Maybe working on my photography skills will be my next project!)

Sunday, May 10, 2009

Apple Pie and Cinnamon Ice Cream


For my first recipe on here I decided to make an Apple Pie. I wanted to just do something basic. I figured when you're trying to get back into the habit of something you go back to the basics and work your way up. I went ahead and also made some cinnamon ice cream. I've been wanting to make cinnamon ice cream for forever so I thought this would be the perfect time.


The apple pie I made was from Martha Stewart. It was made with lime juice, something I've never done before. It added a nice little flavor. Everything else were your basic ingredients. Apples, flour, sugar, butter, cinnamon. I learned that I need to practice my pie dough skills. The dough turned out fine, it was just the rolling out and then forming it all together. But practice makes perfect, so I'm guess I'll be making more pies in the future!


Cinnamon Ice Cream is FABULOUS!!! I love cinnamon. LOVE IT. I added just a little more cinnamon then the recipe called for and I'm glad. I don't think it was too overpowering. Just right. Mmm...so good. I could probably eat the whole batch, but luckily we have neighbors who helped us eat both the pie and ice cream.

I had so much fun making this pie. It's funny when you've stopped doing something for awhile, and then when you restart, things just start coming back. While I was tossing the apples, with everything, I kept remembering things my chef told me to do and different terms. I started laughing cause I really didn't think I'd start remembering things like that. Today was a refreshing start. I seriously love baking. There's just a neat aspect of taking all these different ingredients and creating something so delicious with it!

Apple Pie:

Crust:

  • 2 1/2 cups all-purpose flour
  • 1 1/2 teaspoons salt
  • 1 teaspoon sugar
  • 2 sticks cold unsalted butter, cut into 1/2 inch cubes
  • 1/3 cup plus 2 teaspoons ice water

Filling:

  • 3 1/2 pounds (about 8 medium) heirloom apples, such as Arkansas Black, Caville Blanc, Carpentin, Jonathan, Knobbed Russet or Northern Spy.*
  • 1/4 cup all-purpose flour, plus more for rolling out dough
  • 1/2 cup granulated sugar
  • 2 tablespoons fresh lemon juice
  • 1/2 teaspoon salt
  • 1 teaspoon ground cinnamon
  • 1 vanilla bean, split and scraped
  • 1 tablespoon cold unsalted butter, cut into 1/4 inch pieces
  • 1 large egg yolk
  • 2 tablespoons heavy cream
  • 2 tablespoons sanding sugar

Crust:

Pulse flour, salt, and sugar in a food processor until combined. Add butter, and process until mixture resembles coarse meal, about 10 seconds. With the machine running, add ice water in a slow, steady stream until the mixture just begins to hold together.

Shape dough into two disks, and wrap in plastic. Refrigerate for 1 hour or up to two days.

Pie:

On a lightly floured surface, roll 1 disk of dough to 1/8 inch thickness. Fit into a 9-inch pie plate. Trim edges, leaving a 1-inch overhang. Freeze until firm, about 15 minutes. Roll remaining disk of dough into a 12-inch circle, about 1/8 inch thick. Transfer to a parchment-lined baking sheet, and freeze until cold and firm, about 15 minutes.

Peel and core apples, then cut them into 1/2 to 1-inch chunks and place them in a medium bowl. Add flour, sugar, lemon juice, salt, cinnamon, and vanilla seeds, and toss.

Place apple mixture in prepared pie dish, and dot with butter. Center dough round over apples, and tuck overhang under edge of bottom dough. Using your fingers, gently pinch dough along edge to seal. Using a paring knife, cut eight 2 1/2-inch vents in dough to let steam escape. Freeze pie until firm, about two hours.

Preheat oven to 425° F. Mix yolk and heavy cream in a small bowl, and brush over dough. Sprinkle with sanding sugar. Place dish on rimmed baking sheet, and bake for 15 minutes. Reduce heat to 375° F, and bake until crust is golden brown and juices are bubbling, 50-60 minutes. Transfer pie to a wire wrack to cool completely.

Cinnamon Ice Cream:

  • 1 cup white sugar
  • 1 1/2 cups half-and-half cream
  • 2 eggs, beaten
  • 1 cup heavy cream
  • 1 teaspoon vanilla extract
  • 2 teaspoons ground cinnamon
In a saucepan over medium-low heat, stir together the sugar and half-and-half. When the mixture begins to simmer, remove from heat, and whisk half of the mixture into the eggs. Whisk quickly so that the eggs do not scramble. Pour the egg mixture back into the saucepan, and stir in the heavy cream. Continue cooking over medium-low heat, stirring constantly, until the mixture is thick enough to coat the back of a metal spoon. Remove from heat, and whisk in vanilla and cinnamon. Set aside to cool.

Pour cooled mixture into an ice cream maker, and freeze according to the manufacturer's instructions.

(Sorry no pictures of the ice cream. Pictures didn't turn out too great!)